
Lemon Creme Brulee Bars
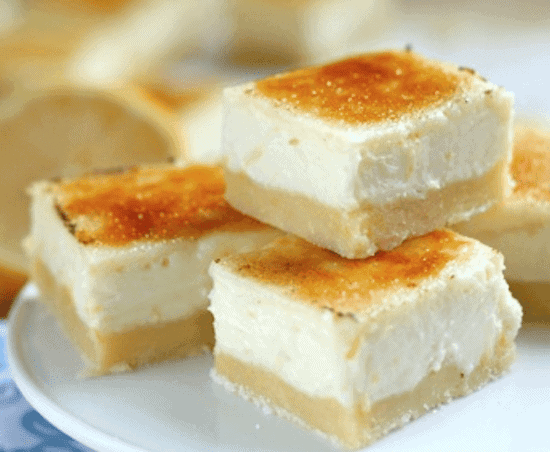
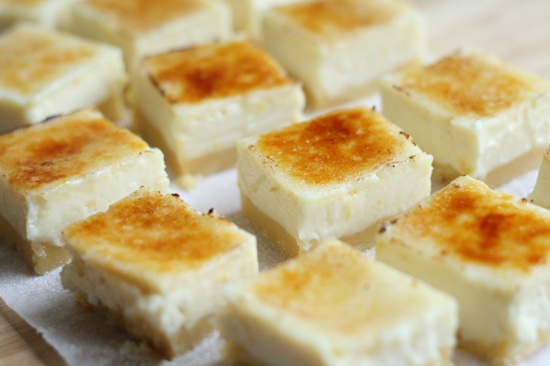
These Lemon Creme Brulee Bars pack a lot into one little square. You get a buttery shortbread crust, smooth lemon cheesecake filling, and a crisp caramelized sugar topping that cracks when you bite into it. The fresh lemon keeps the cheesecake bright and balances all that rich, creamy goodness.
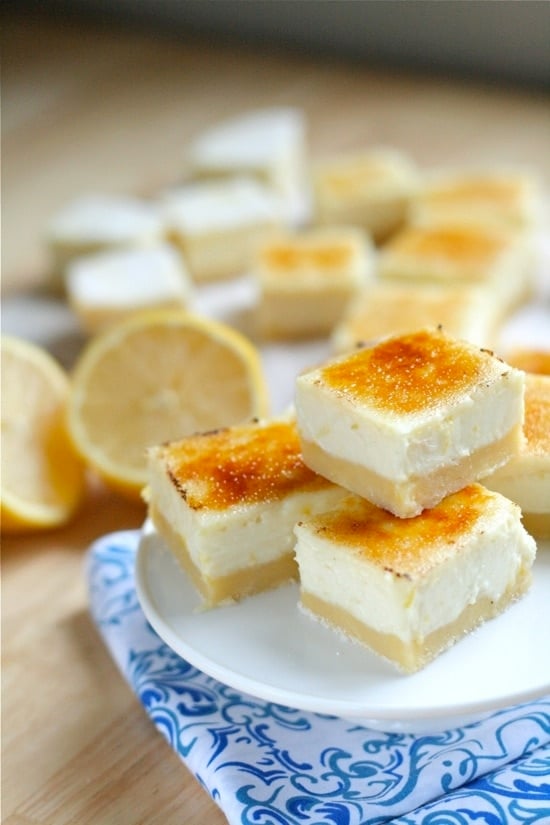
Ingredient Notes
Can you believe these Lemon Creme Brulee Bars only need 9 ingredients? Here’s what you’ll need:
- Butter – Helps hold the crust together. Be sure to use softened butter, not melted.
- Sugar – Adds sweetness to the crust.
- Flour – Makes up the base of the crust.
- Vanilla – Adds a little extra flavor to the crust and filling.
- Cream Cheese – The main ingredient in the creamy lemon cheesecake filling.
- Sweetened Condensed Milk – Adds sweetness and gives the filling a smooth, creamy texture.
- Egg – Helps the cheesecake filling set and adds richness.
- Lemon Juice + Zest – The juice adds bright lemon flavor and helps the filling set, while the zest adds even more lemon flavor.
- Fine Granulated Sugar – Used to create the crisp, caramelized brûlée topping.
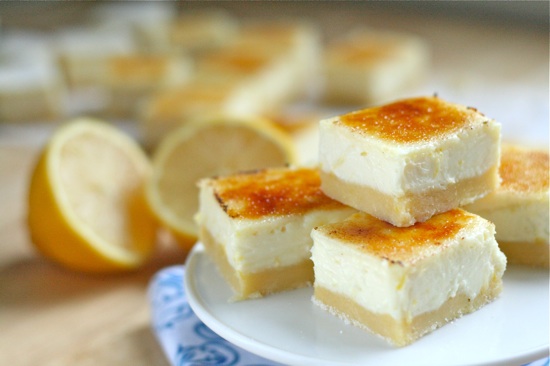
How to Make Lemon Creme Brulee Bars
These Lemon Creme Brulee Bars come together in a few simple steps. For exact measurements and baking times, see the recipe card below.
Step 1: Preheat + Prep
Preheat the oven. Line an 8×8 glass baking dish with parchment paper, leaving some overhang for easy removal, then lightly spray with nonstick cooking spray. Set aside.
Step 2: Make the Crust
In a large mixing bowl, combine the softened butter, sugar, flour, and vanilla until a dough forms. Press the dough evenly into the bottom of the prepared dish.
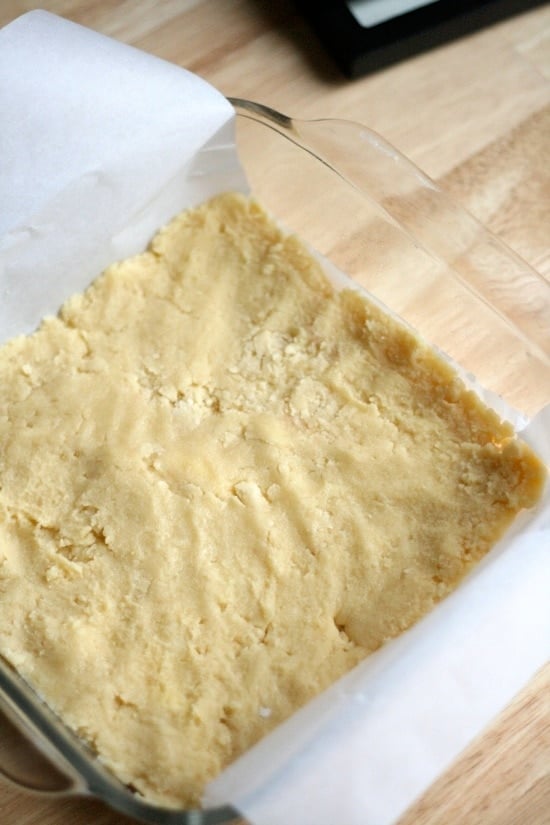
Pro Tip: Press the crust into an even layer so it bakes evenly from edge to edge. This helps prevent thin spots from overbaking while thicker areas stay soft or underbaked.
Step 3: Make the Lemon Cheesecake Filling
In another bowl, beat the cream cheese with a hand mixer or stand mixer until smooth. Add the sweetened condensed milk and mix well, scraping down the sides as needed. Add the egg, lemon zest, and lemon juice, then mix until smooth and slightly thickened.
Pour the filling over the crust and smooth the top.
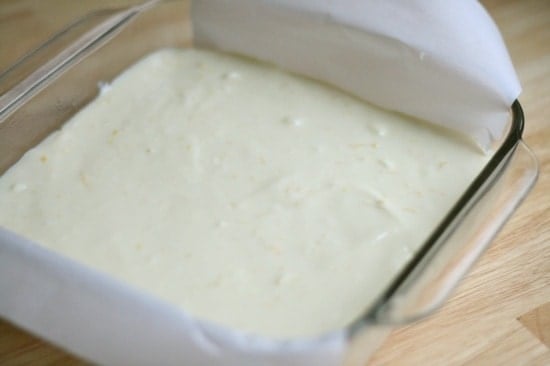
Step 4: Bake + Chill
Bake until the cheesecake is completely set. Let the bars cool, then refrigerate until thoroughly chilled.
Once chilled, cut into 16 squares and separate them on a baking sheet or serving platter.
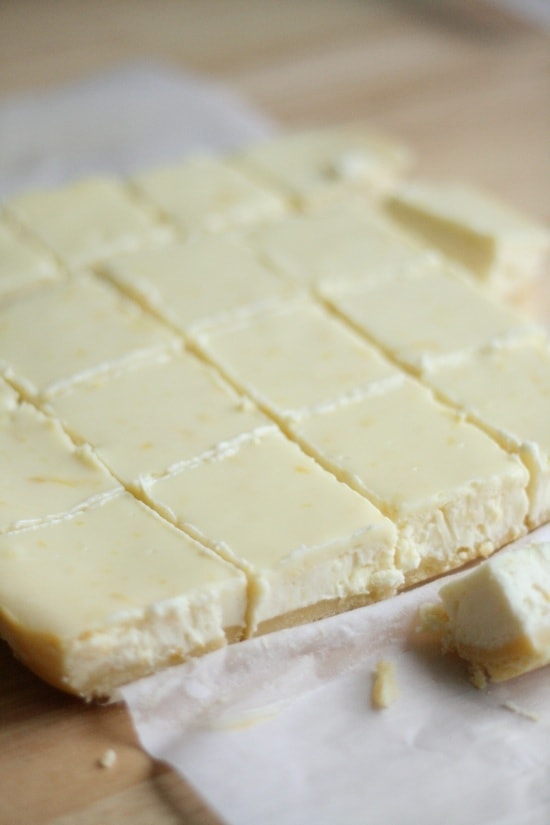
Make-Ahead Tip: These bars need time to chill, so you can make them a day ahead and keep them refrigerated until you’re ready to finish and serve them.
Step 5: Add the Sugar + Torch
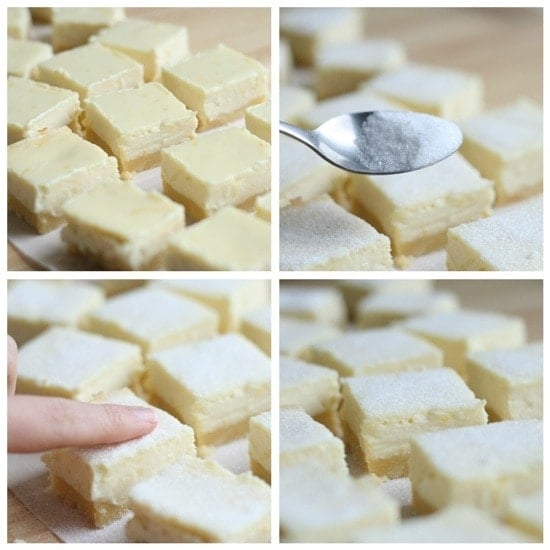
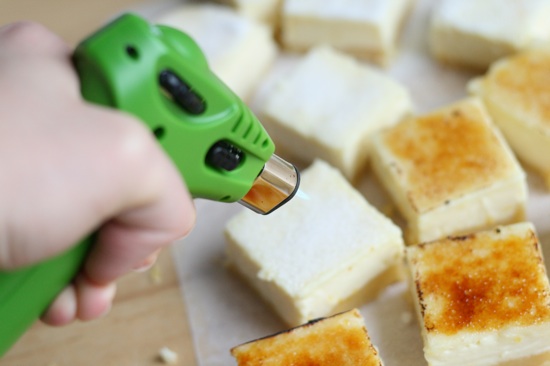
Sprinkle about 1 teaspoon of fine granulated sugar over each bar. Gently spread the sugar into an even layer with your finger, then use a kitchen torch to caramelize the tops until the sugar melts and turns amber.
If you don’t have a kitchen torch, place the bars under the broiler for a quick finish, watching them closely so the sugar doesn’t burn.
Return the bars to the refrigerator until ready to serve.
Tips for Success
A few simple tips will help you get smooth, creamy bars with a crisp brûléed topping.
- Use room-temperature cream cheese. It blends more evenly with the other ingredients, giving the cheesecake layer a smooth texture without small lumps.
- Measure the sugar topping evenly. A thin, consistent layer caramelizes more evenly and gives you a crisp shell without an overly thick layer of hard sugar.
- Watch the edges while baking. The center can still have a slight jiggle when the bars are ready. Overbaking can make the cheesecake layer firmer than you want.
- Let the bars chill fully before slicing. This gives the layers time to set, making cleaner cuts and keeping the crust from crumbling.
- Torch the sugar right before serving. The caramelized topping is best when it’s freshly crisp, so torch it as close to serving time as possible.
- Move the torch constantly. Keep the flame sweeping across the surface to caramelize the sugar evenly instead of burning one spot.
What to Serve With Lemon Creme Brulee Bars
These lemon crème brûlée bars are bright, creamy, and sweet, so I like serving them with simple drinks or lighter desserts that let the lemon flavor shine.
- Blackberry Lemonade – Fresh blackberries and lemon juice make a sweet-tart drink that pairs nicely with the creamy lemon bars.
- Homemade Whipped Cream – A small dollop adds a creamy finish without overpowering the lemon.
- Fruit Salad – Fresh berries and other fruit add a light, juicy option alongside the rich cheesecake bars.
- Vanilla Ice Cream – A scoop of vanilla ice cream adds a cool, creamy contrast to the crisp brûléed topping.
- Lemon Crinkle Cookies – For a lemon-themed dessert table, these cookies keep the citrus flavor going while adding a different texture.
Throw these Lemon Creme Brulee Bars onto a serving platter and voila! A perfect dessert everyone will love! Sweet and tart, similar to key lime pie, but a million times better! Enjoy! 
Lemon Cheesecake Creme Brûlée Bars
Ingredients
- 1/2 cup butter softened
- 1/2 cup granulated sugar
- 1 cup all purpose flour
- 1/2 teaspoon vanilla extract
- 8 oz cream cheese softened
- 14 oz sweetened condensed milk 1 can
- 1 egg beaten separately
- 2 tablespoons lemon zest
- 6 tablespoons lemon juice
- 5 tablespoons fine granulated sugar for brulee-ing, approximately
Instructions
-
Preheat oven to 350° F. Line an 8×8 glass dish with parchment paper and lightly spray with nonstick cooking spray. Set aside.
-
Add beaten egg, lemon zest, and lemon juice. Mix until mixture starts to thicken, 20-30 seconds. Scrape sides and mix again briefly.
-
Pour cream cheese mixture overtop cookie bottom and smooth the top.
-
Remove from refrigerator and cut into 16 squares. Separate the squares
-
Return squares to fridge until ready to serve.
Nutrition
Tools You’ll Need
You don’t need much to make these lemon creme brulee bars, just a few basic kitchen tools.
- 8×8 glass baking dish – Great for even baking and lets you easily see how the bars are coming along.
- Kitchen torch – This is what gives the sugar topping that crisp, caramelized layer that makes these bars taste like crème brûlée.
- Mixing bowls – Use a few different sizes to keep the crust, cheesecake filling, and other ingredients organized.
- Hand mixer or stand mixer – Makes it easy to get the cheesecake filling smooth and creamy without overworking it.
- Parchment paper – Line the baking dish with it for easier removal and cleaner cuts.
Variations
These bars are easy to change up with a few simple ingredient swaps. Try one of these variations when you want to give the recipe a slightly different flavor.
- Berry Lemon: Add fresh blueberries or raspberries to the cheesecake layer for a fruity twist that pairs well with lemon.
- Orange: Replace some of the lemon zest with orange zest for a milder citrus flavor.
- Lime: Swap some of the lemon juice and zest for fresh lime for a sharper citrus flavor.
- Graham Cracker Crust: Use a graham cracker crust instead of the original crust for a classic cheesecake-style base.
How to Store Lemon Creme Brulee Bars
Refrigerate: Once the bars have completely cooled, cover the baking dish tightly and store them in the refrigerator for up to 3 days. Keeping them chilled helps the cheesecake layer stay firm and makes the bars easier to slice.
Add the Brûlée Topping Before Serving: Keep the sugar topping off until you’re ready to serve. Sprinkle a thin, even layer of sugar over the chilled bars, then use a kitchen torch to caramelize it. This gives you that crisp, crackly topping instead of letting it soften in the refrigerator.
Skip the Freezer: I don’t recommend freezing these lemon crème brûlée bars. The cheesecake layer can change texture after thawing, and the crisp sugar topping won’t hold up well.
More Lemon Recipes to Try!
If you liked these lemon creme brulee bars, check out these related recipes
- Classic Lemon Bars
- Lemon Bar Ice Cream
- Lemon Meringue Cheesecake
- Lemon Cheesecake Tart
- Lemon Blueberry Cheesecake
- Meyer Lemon Pound Cake
If you make this recipe, I would really appreciate it if you would give it a star rating and leave your review in the comments! If you have a picture of your finished dish, post it on Instagram using the hashtag #laurenslatest and tagging me @laurens_latest.